FROM ROB'S BENCH
Breathing new life into an old table

Rob Brown

Blog for April 2, 2026
Last week I left off telling you about a tiny, curved lamination being epoxied in the shop to replace some of the trim in the top of a coffee table I was repairing.
I used epoxy because it creates a more rigid lamination than standard wood glue, and because the pieces were going to finish quite small, I couldn’t have them flex or move at all.
I returned to the shop the next morning and found a tiny disaster. The tape had let go overnight and the lamination was ruined. Not a huge deal, as I could easily make another. In fact, because I was worried about the tape ruining the finish, I didn’t add much of it, so it was no surprise that it came unstuck overnight. I set up the lamination again, made a few slight adjustments, and by the next day all was good.
I used a hand plane to flatten one edge, then made a couple of trim cuts at either end of the damaged trim piece on the table. I cut the ends at a slight angle, so it would sneak up on a snug fit when shaping the trim to size. This approach worked out well, and within a few minutes I was ready to install the piece of trim to the first area. For this, I used wood glue, as I wasn’t sure I could keep the epoxy from slowly dripping onto the finished surface of the tabletop. Because it takes so long to dry, I feared a large mess by the next day. I could have used a quick-set epoxy, though I had none in the shop. Not to worry, regular wood glue would work just fine.
Shape the trim and repeat
When it was dry, I removed the clamps and shaped the piece of trim with a chisel. I wanted to see how this small piece of trim turned out before moving to the larger piece of damaged trim. All worked out well, and a bit of careful sanding brought all the surfaces into the same plane; you couldn’t feel where the old trim stopped and the new trim started. I then repeated this for the other section of missing trim.
Now the hard part
As I mentioned last week, fixing broken parts, replacing veneer and strengthening joints is fairly easy. It’s matching existing finishes that’s the tricky part, and that was up next. I had a few dark brown stains in my finishing cabinet, so I started there. There was a decent amount of red in this table, too, so I knew I might have to add some red in somehow.
I stirred the two stains I thought would be closest, applied them to a small piece of sanded veneer and brought them to the table for comparison. They were somewhat close, which was a good sign. At that point, I thought I should maybe add a quick coat of a topcoat finish to these tiny swatches, as that often changes the colour slightly. A quick application with an aerosol spray finish and the colours were both even closer. One was a bit too light, while the other was a bit too dark, which isn’t a bad scenario. They were both oil-based stains, so I mixed the two together and applied them to another piece of veneer. The result was darn close. Usually the process takes a lot more time and focus, but I sure wasn’t complaining.
Add some colour
I used a tiny piece of workshop paper towel to add the stain to the pieces of trim and veneer, then let that dry for a few hours. I decided to add a few light coats of shellac over the stain. Doing so would allow me to carefully sneak up on the final colour and sheen, while creating a match that wouldn’t be visible by the clients.
I applied a few coats, then let them dry for a half hour or so, then repeated the process. It wasn’t until at least eight coats were applied that I started to approach something close to the existing finish, but these coats go on fast and dry fairly quickly, too, so it wasn’t hard. If you haven’t used shellac, you should consider it. We have lots of articles on our website, as well as a video I made, of how to apply shellac. It’s a great finish that has helped me out many times.
After at least a dozen coats, I was about finished. A little bit of steel wool and wax helped me further dial in the sheen and create a finish that, while not perfect, was pretty darn close.
At that point I set up to take a few photos of the newly completed areas, but the slight differences were being amplified by the camera. Whoever said “the camera doesn’t lie” doesn’t know enough about how a camera sees light. Every photo I took showed a relatively large difference between the fixes I made and the rest of the table, even though the naked eye was seeing the two as more equals. So, sorry, no photos of the finished piece.
Delivery
I brought the table over to its owners, who immediately commented on how good it looked. I asked them if they could find the fixes. They eventually did, though they also knew where to look. Even then, it took them about 10 seconds to spot the fixes. I think I held up my end of the bargain; they will be able to see the fixes, but visitors won’t notice them. In the end, everyone was happy that new life could be breathed into this cherished coffee table.
Failed Attempt
The next morning revealed I didn't put enough tape on the lamination to hold until the epoxy dried. At least none of the finish was damaged. My second attempt at creating a tiny bent lamination proved to be much more successful.
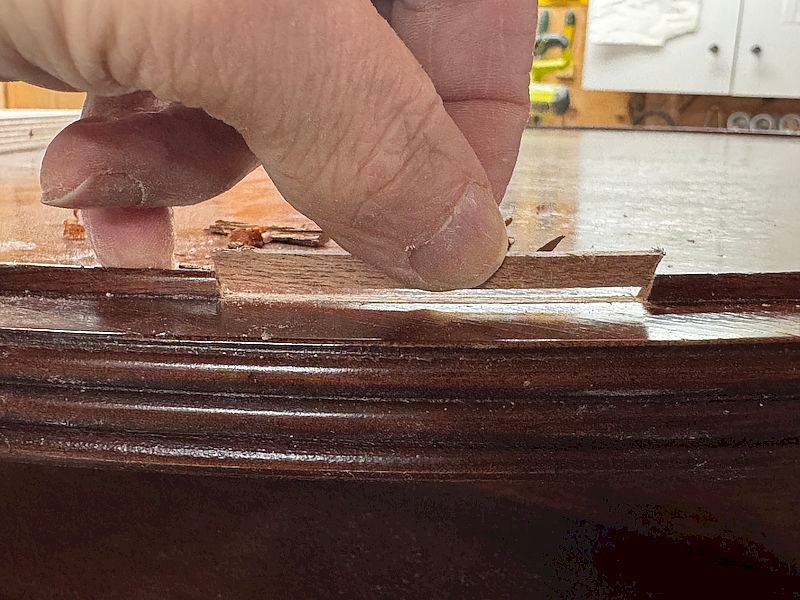
Angled Edges
Here, I'm sneaking up on the length of the replacement trim. This was possible, as the ends of the existing trim were cut at an angle. If I did happen to shape the piece of trim too narrow, I could also shave a bit off its underside to create a better fit.
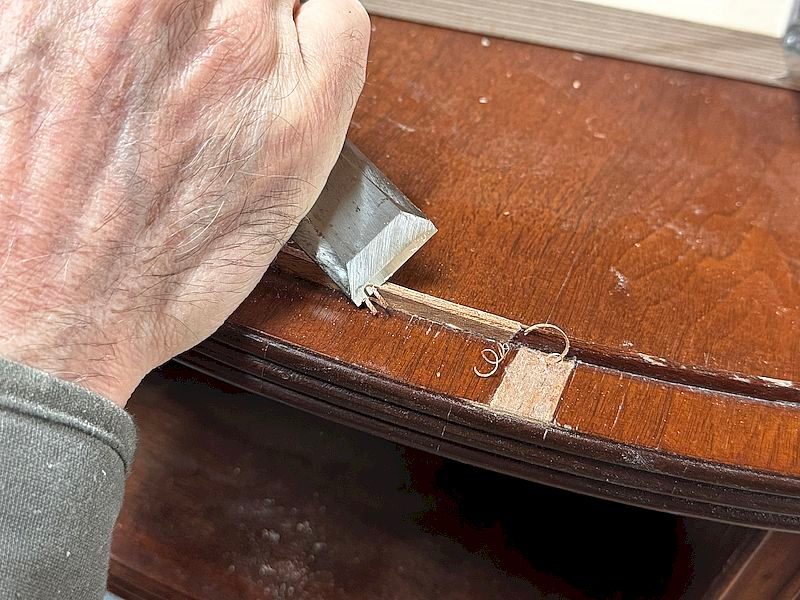
Shave It Down
A chisel allowed me to round over the two upper corners and flush the piece of new trim with the existing trim. A bit of sandpaper perfected the trim.
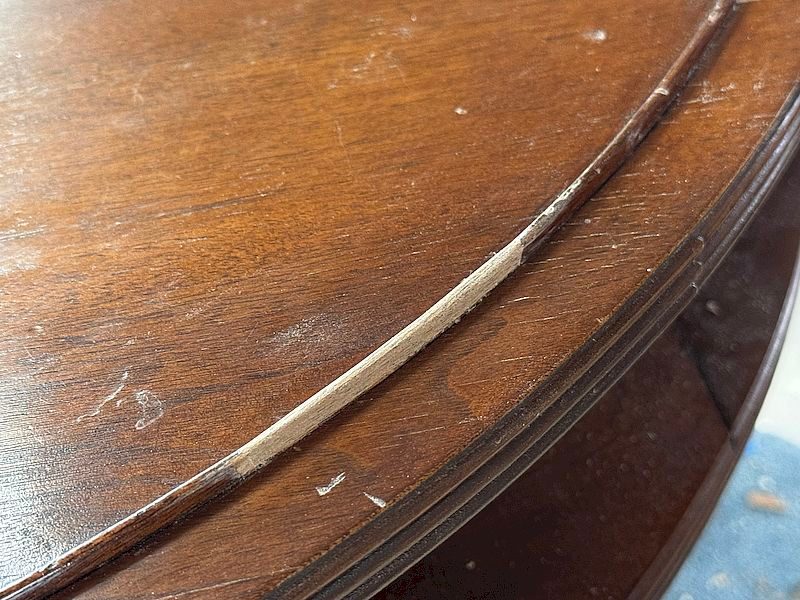
Nice and Smooth
The completed piece of trim. Now, repeat that one more time.
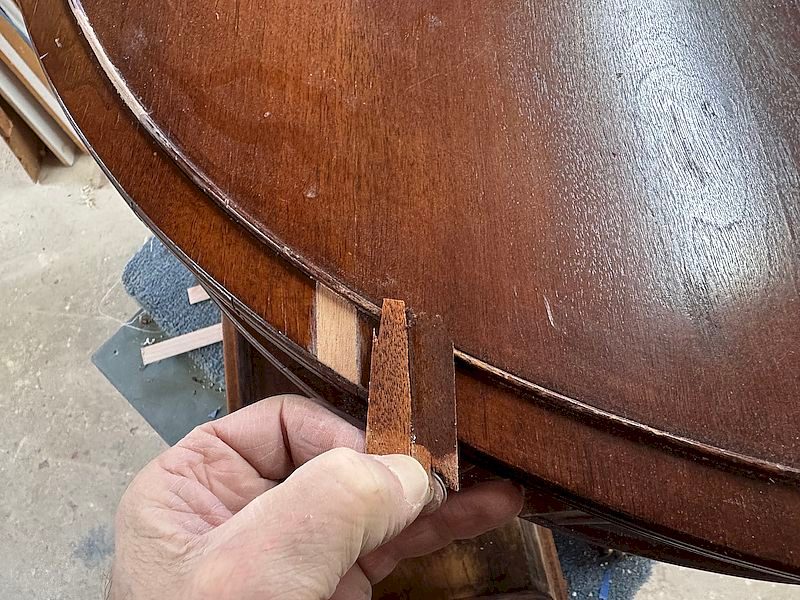
A Bit of Both
My two dark brown stains straddled the final colour I was looking for. A bit of mixing and I was almost there.


Color matching can be a bear sometimes. Looks like you did a great job.